Configuring DELLEMC Avamar Virtual Edition (AVE) & Data Domain Virtual Edition (DDVE) for VMware Environment
In this blog post i am going to cover configuration of Avamar Virtual Edition (AVE) & Data Domain Virtual Edition (DDVE)
Dell EMC Avamar Virtual Edition is great for enterprise backup data protection. Avamar Virtual Edition is optimized for backup and recovery of virtual and physical servers, enterprise applications, remote offices, and desktops or laptops.
Key features:
- Delivers a software-only data protection solution
- Supports VMware vSphere, Microsoft Hyper-V and Azure
- Provides guest and image-level backup and recovery
- Enables application-consistent recovery
- Uses variable-length deduplication
- Uses AES-256 encryption to secure data in flight or at rest
Data Domain Virtual Edition (DDVE) is a software-defined data protection solution. DDVE can be up and running in minutes on any standard server, converged or hyper-converged. DDVE delivers increased transactional and operational efficiencies, reliability. DDVE can provide data protection to multiple virtual server environments based on VMware ESXi, VMware vSphere, Microsoft Hyper-V, and KVM.
DDVE can protect data, backup and restore between virtual machines on the same server, across multiple servers or in the cloud. It can serve protection across multi-tenant environments too.
From here on I will use AVE & DDVE abbreviations for Avamar Virtual Edition & Data Domain Virtual Edition respectively.
To begin with I presume you know how to deploy AVE & DDVE for VMware platform. Please hit me with PM in case you need more info on deploying AVE & DDVE.
Configuring DELLEMC Avamar Virtual Edition (AVE).
List of Tasks:
- Install Avamar administrator on your client
- Apply License to Avamar
- Integrate Avamar with AD
- vCenter certificate authentication
- Add the Cloud vCenter to Avamar
- Deploy Avamar Proxy Instances
- Configure Avamar Proxy for Management Workload Domain datastore protection
- Protect Cloud Management Domain
Install Avamar administrator on your client windows desktop or jump server. Java is required to run the Avamar administrator
- Open Avamar server web page, e.g. http://avamar-FQDN
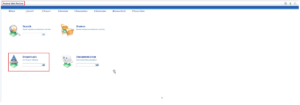
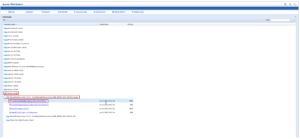
- From downloads page, find and download the admin console installer.
- Save and run the installation package (right click and Run as Admin).
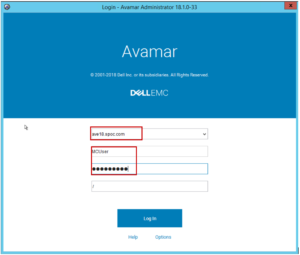
- Once you have installed the Avamar Administrator, start it from windows client.
- Logon using root user, MCUser or Admin user account with password (specified during installation)
Apply License to Avamar
The following steps are required to license Avamar
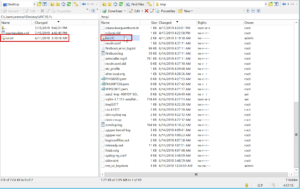
- Use SCP to copy lic from your desktop to AVE node into /tmp location
- change path to cd /usr/local/avamar/etc/
- copy lic from /tmp to /usr/local/avamar/etc/ as license.xml
- cp /tmp/AVMR_4085083_15-Jul-2019_exp.lic license.xml
- change permission to the license.xml
- chmod 644 license.xml

- Apply the lic as below
- avmaint license license.xml –avamaronly

- Verify license with:
- avmaint license –avamaronly
Integrate Avamar with AD
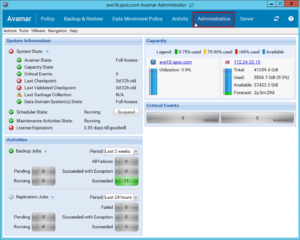
- Launch the Avamar Administrator console and log in with a local Avamar user e.g. MCUser
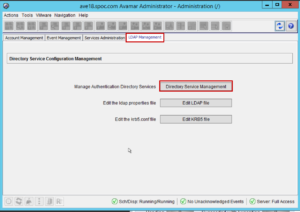
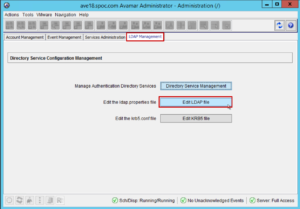
- Click Administration > LDAP Management
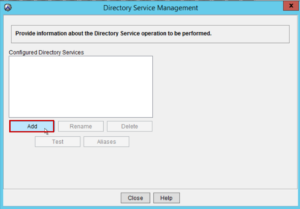
- Click Directory Service Management and click Add
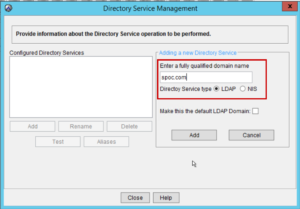
- Enter the fully qualified domain name e.g. spoc.com
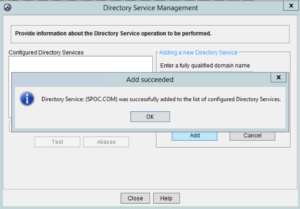
- Click Add and click Close
- On the LDAP Management tab click Edit the ldap.properties file
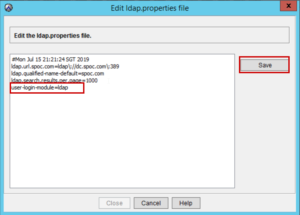
- Add the following line to the ldap.properties file and click Save and Close
- user-login-module=ldap
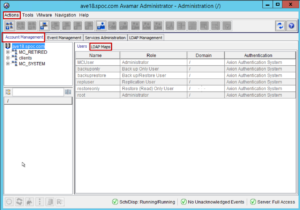
- To enable login for domain users navigate to Administration > Account Management
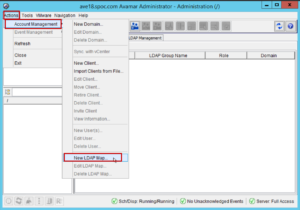
- From the actions menu select Account Management > New LDAP Map
- The LDAP domain you added previously should automatically populate.
- Enter the AD group you wish to add and click Search e.g Avamar_Admins
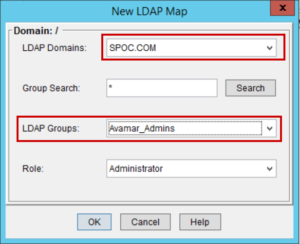
- Choose a role to assign to the group and click OK. In this case we have assigned the Administrator role to the Avamar_Admins group
- You should now be able to log in as a member of the Avamar_Admins AD group
vCenter certificate authentication
- Ssh to the the Avamar server via RDP or vSphere console as member of VC_Admins.
- Using SCP or similar, perform the following copy operation
- From vCenter vCSA: /etc/vmware-vpx/ssl/rui.crt
- SSH to the Avamar server with “su – admin”
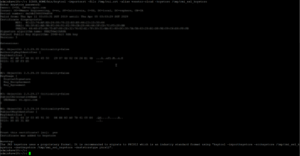
- Create a temp version of the MCS keystore by making a backup of the live keystore that is ‘/usr/local/avamar/lib/rmi_ssl_keystore’ by running:
- cp -p /usr/local/avamar/lib/rmi_ssl_keystore /tmp/
- Stop the MCS by typing:
- dpnctl stop mcs

- Add the default vCenter certificate to the temporary MCS keystore file by typing the following on single command line, replacing vcenter-cloud as appropriate:
- $JAVA_HOME/bin/keytool -importcert -file /tmp/rui.crt -alias vcenter-cloud -keystore /tmp/rmi_ssl_keystore
Note – The alias vcenter-cloud is a user-defined friendly name for the certificate entry in the keystore. Each certificate in the keystore must have a unique alias.
- When prompted for a password, enter new password
- When prompted enter yes to trust the certificate and press ENTER
- Backup up the live MCS keystore by typing the following:
- cp -p /usr/local/avamar/lib/rmi_ssl_keystore rmi_ssl_keystore.date
- Copy the temporary MCS keystore (that is, /tmp/lib/rmi_ssl_keystore) to its original (live) location by typing:
- cp -p /tmp/rmi_ssl_keystore /usr/local/avamar/lib/.
- Restart the MCS by typing:
- dpnctl start mcs

Add the Cloud vCenter to Avamar
To add a vCenter client, follow these steps:
Note – Be sure you have added the vCenter SSL certificate and restarted “mcs” service
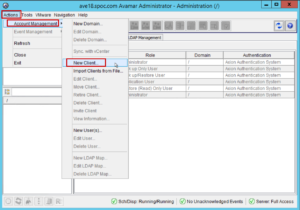
- In Avamar Administrator, select Navigation > Administration or click the Administration launcher button
- select Actions > Account Management > New Client
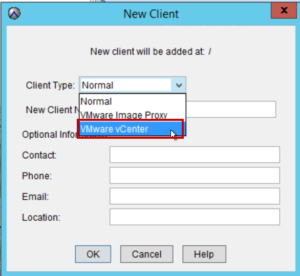
- For the Client Type select VMware vCenter and complete the following settings:
- Select VMware vCenter in the Client Type list
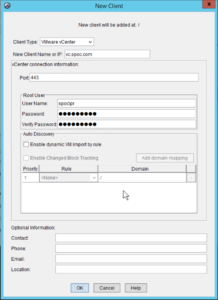
- Type the Cloud vCenter fully qualified DNS name or IP address in the New Client Name or IP field.
- Type the vCenter web services listener data port number in the Port field. 443 is the default setting.
- Type the vCenter user account name in the User Name field. This should be the app_avamar_vcenter service account and ensure to include the domain name e.g. DOMAIN\app_avamar_vcenter
- Type the vCenter user account password in the Password field.
- Type the vCenter user account password again in the Verify Password field and click OK.
Deploy Avamar Proxy Instances
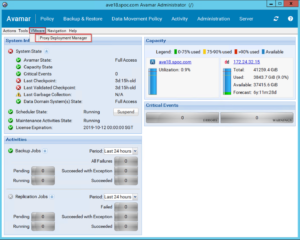
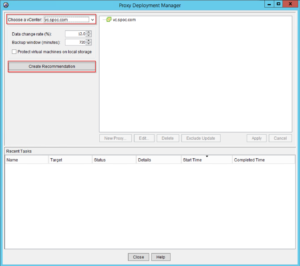
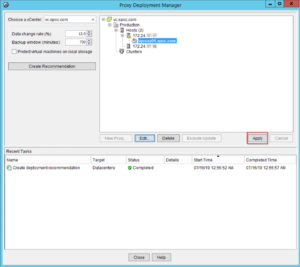
- From Avamar console, access VMware tab from the top menu and click Proxy Deployment Manager
- You can select ‘Create Recommendation’ option for AVE to suggest number for necessary AVE proxy’s based on your VMware environment.
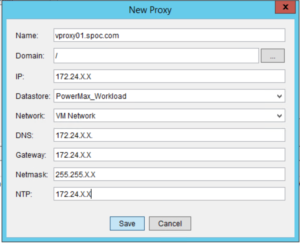
- Once the recommendation is create, you can edit each recommended proxies and assign IPs, DNS & other settings
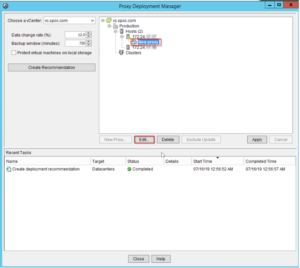
- Once applied, necessary number of proxies would be deployed in VMware Cluster.
Configure Avamar Proxy for Management Workload Domain datastore protection
Any datastores that store cloud management Virtual Machines needing to be backed up need to be manually added to the individual proxies.
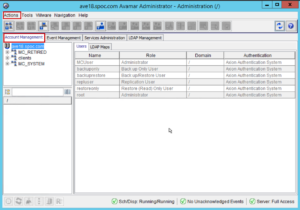
- In Avamar Administrator, click the Administration launcher button. The Administration window appears
- Click the Account Management tab.
- Select the proxy, and then select Actions > Account Management > Client Edit. The Edit Client dialog box appears.
- Click the Datastores tab, and then select datastores that host virtual machines you want to protect with this proxy.
- Click the Groups tab, and then assign this proxy to one or more groups by clicking the
- Select checkbox next to each group & quick OK
Protect Cloud Management Domain
In order to provide image-level protection for the VMs residing in the Management Workload Domain, the Cloud vCenter client policy in Avamar must be manually activated and the associated VMs added.
- In the Avamar Administrator UI, and select Policy
- Select vCenter FQDN
- Switch to Clients tab
- Select vCenter in the navigation pane and also select it as a client in the right hand pane and then click ‘Edit’
- Uncheck ‘Disable all backups’
- Check ‘Activated’ & Click OK
- Close the Policy Window & Select Administration
- To add the client VMs residing in the relevant cluster, select the Cloud vCenter, right-click and select ‘New Client(s)’
- Navigate to Hosts & Clusters tab
- Select the cluster(s) hosting the management domain
- Leave the Dynamic option selected for the Virtual Machine Container Inclusion, select Enable Changed Block Tracking and click Select All & Click OK
—————————————————————————————————————————————————————————————————————————————————————————————————————————————-
Configuring DELLEMC Data Domain Virtual Edition (DDVE)
List of Tasks:
- Set up time and date settings
- Enabling AD integrated management of Data Domain
- Adding Domain Accounts with DDVE privileges
- DDBoost User Account Creation
- Enable DDBoost
- SNMP Setting
- Add DDVE to Avamar
Once the DDVE system has been installed and configured on the network there are a number of tasks you need to complete in order to connect it with Avamar via DD Boost.
Manually configure NTP server and set up time and date settings from DD System Manager by browsing to Administration > Settings
Enabling AD integrated management of Data Domain
- Login to Data Domain System Manager Web Console with http://datadomainFQDN/. The default credentials are sysadmin/Password123!
- From DD System Manager UI, go to Administration > Access > Authentication and click ‘Configure’ under Active Directory tab:
- Choose Configure
- Change the mode to Active Directory click Next and set the realm to the full name of the domain you wish to join
- Configure the AD/ Kerberos Authentication and click finish to commit the changes
- At this point, the Active Directory Administrative Access should show ‘Enabled’
- To specify the AD Domain details, enter credentials with the rights to add the DD unit to AD and click OK. The services will be restarted during this Click OK to proceed.
- Once complete, add the relevant users with appropriate rights using the green ‘+’ button on the right corner:
Adding Domain Accounts with DDVE privileges
Specify the AD group and the relevant permission you wish to assign to them
Connect to the management IP Address of the DDVE unit via SSH and login as a local admin user in order to confirm that windows admin access is permitted
Run the following command to view current setting
-
- adminaccess authentication show
If the result is disabled then run the following command
-
- adminaccess authentication add cifs
To confirm that it is now enabled run
-
- adminaccess authentication show
DDBoost User Account Creation
In order to connect Avamar to Data Domain using DD Boost, you need to create a local user on the Data Domain which will later be used by Avamar.
- Login to Data Domain System Manager Web Console with http://datadomainFQDN/ using an account with admin privileges on the Data Domain unit.
- On the left pane, select Administration > Access > Local Users. Click on ‘Create’ button
- Provide the user name, password and make sure the management role is set to ‘admin’
- Click OK button.
Enable DDBoost
- Make sure DDBoost is enabled by navigating to Protocols > DD Boost
- Ensure that DD Boost Status is set to enabled.
- Add the user created in the previous section using the Plus symbol to ensure the user has DD Boost Access
SNMP Setting
The final Data Domain configuration step is to set the SNMP Read/Write Community and trap host configuration to use along with Avamar.
- To configure the SNMP settings, navigate to Administration > Settings > SNMP tab.
- Scroll down to locate SNMP V2C Configuration section.
- Under Trap Hosts, click on the Create… button
- Under Host, provide the Avamar Host name
- Set the port as 163.
- Under community drop down select ‘Create New Community’
- Enter the name of the new Community (public in this example)
- Set access to Read-Write
- Click the Plus sign to add a Host
- Specify the name of the Avamar Host name again & Click OK.
- The new community now show in the Trap Host window & Click OK
Add DDVE to Avamar
To configure the Data Domain unit as a backup target within Avamar, you need to execute the following tasks:
- Open the Avamar Administrator Console
- Click on Server tab
- Click on the Server Management tab
- Click on Actions -> Add Data Domain System
- On the System tab of the subsequent Window input the following details
- Provide Data Domain FQDN DNS name
- DDBoost user name and password
- On the SNMP tab
- Click on Enable SNMP Getters/Setters
- Provide the SNMP Read Write Community String (Public) & Click on OK.
- On the System tab of the subsequent Window input the following details
Once it is added, the server becomes visible as an object under the Data Domain heading
Hope you enjoyed this post, I’d be very grateful if you’d help sharing it on Social Media. Thank you!