DellEMC PowerProtect for Data Protection in VCF on VxRail – Deploy & Configure PPDM
In this blog, I will cover deployment & Configuration of DellEMC PowerProtect Data Protection Software.
Dell EMC PowerProtect Software provides software-defined data protection, duplication, operational agility, self-service and IT governance.
- Empowers data owners to perform self-service backup and recovery operations from their native applications
- Provides IT with oversight and governance to ensure compliance and meet even the strictest of service level objectives
- Maximize investment in protection storage with Dell EMC Data Domain superior deduplication
PowerProtect Data Manager resource requirements on VMware environment
The PowerProtect Data Manager appliance has the following minimum system requirements for the VMware environment (ESXi server) it is running on:
- 10 CPU cores l 18 GB (The ESXi server requires at least 18 GB of RAM available for PowerProtect Data Manager)
- Five total disks:
- Disk 1 of 100 GB
- Disk 2 of 500 GB
- Disk 3 of 10 GB
- Disk 4 of 10 GB
- Disk 5 of 5 GB
- One 1-GB NIC
High Level Activity List –
New PPDM Install
License
Authentication
System Settings
Email & Auto-Support
Configuring Infrastructure
Assess Sources – vCenter
Discovery of VM objects
Protection Storage – DataDomain
Protection Engines – VM Proxies
Let us start with deploy and configuring the PPDM.
Deploy the OVA file to a vCenter server. You can download necessary OVA file from DellEMC support site. I will not go into details on how to deploy an OVA file in vCenter. I presume its straight forward and standard procedure to deploy any other OVA file.
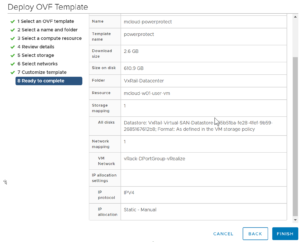
In the Ready to Complete window, verify the OVF template details, and click Finish.
Configure the PowerProtect Data Manager virtual appliance
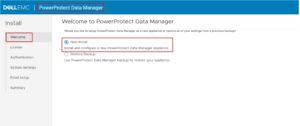
After you deploy and power ON the PowerProtect Data Manager appliance, you must configure the virtual appliance. The PowerProtect Data Manger welcome screen will appear.
Select ‘New Install’ to begin the configuration.
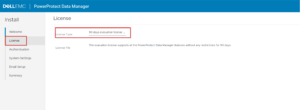
Add necessary license file. I am using 90 Days evaluation license. The evaluation license supports all the PowerProtect Data Manager features without any restriction for 90 days.
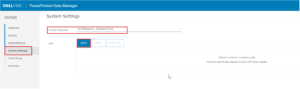
Next, set a password for use across all the PowerProtect DM interface.

Configure the correct Timezone and add NTP server for time synchronization.
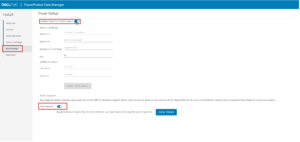
Setup email configuration, and AutoSupport. AutoSupport sens diagnostic and usage data to DellEMC for proactive support and to help improve product and services. Either Secure Remote Service (SRS) or Email server needs to be configured for Auto Support to function properly.
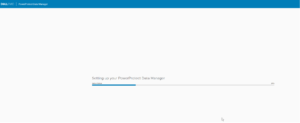
Notice Setup status. Wait until setting up PPDM successfully complete.
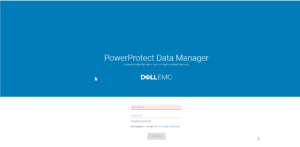
Once the setup completed successfully, we will login to the PPDM GUI.
Next, PPDM getting Started page will appear. The Getting Started page will assist in configuring key elements of the PPDM.
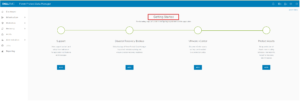
We will now start with ‘Infrastructure’ configuration e.g. adding VMware vCenter, Protection Storage, Protection engine etc.
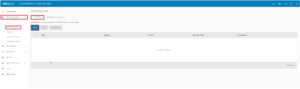
First, let’s Add ‘VMware vCenter’ as Asset Sources in PPDM.
Enter the necessary vCenter connection information and credentials to access the vCenter.
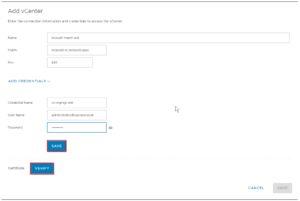
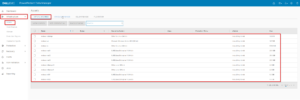
Once the Certificate is verified, notice vCenter will be available in the Asset Sources.
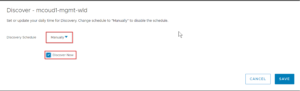
Next, we will click on ‘Discover’ radio button to start the manual discovery of the vCenter objects such as Virtual Machines.
Select on ‘Discover Now’ and save the changes.
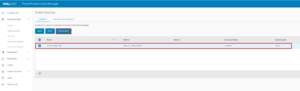
Once the discovery completed successfully, we will verify the Assets e.g Virtual Machines.
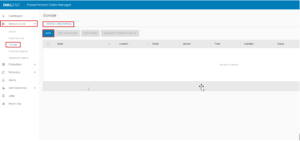
Next, we will add DataDomain system as a ‘Protection Storage’ in PPDM.
To add DataDomain, select ‘Storage’ from ‘Infrastructure’ tab and click on ‘Add’ button.
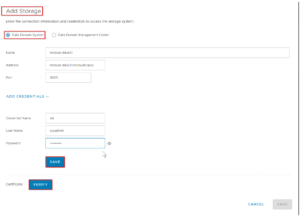
Enter the connection information and credentials to access the Storage system i.e. DataDomain.
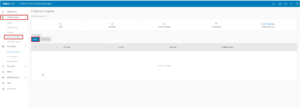
Finally, we will add and configure ‘Protection Engines’. VM Proxies are configured as Protection Engines.
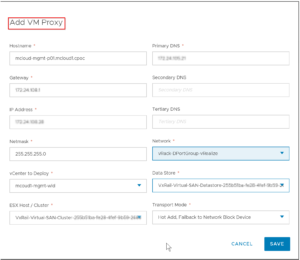
To add ‘VM Proxies’, select ‘Protection Engines’ from ‘Infrastructure’ tab and click on ‘Add’ button.
Enter the necessary VM Proxy details such as ‘Hostname’, ‘Gateway IP’, ‘IP Address’ for VM Proxy etc.
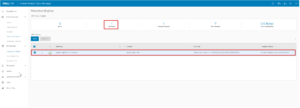
The VM proxy will be deployed and configured based on information provided above. Once the Proxy is deployed, notice VM Proxy is active as part of ‘Protection Engines’
At this point we have configured the PPDM with necessary Infrastructure. Next step would be to setup Application Agents for various Databases and configure the Protection Policies. However, in this blog, I will not cover Application Agents & Protection Policies from PPDM GUI.
Hope you enjoyed this post, I’d be very grateful if you’d help sharing it on Social Media. Thank you!
One Comment
Pingback: