How to Install the Azure Stack Development Kit – ADFS (Disconnected)
In this article I am going to cover how to install the Azure Stack Development Kit also known as ASDK in disconnected mode using Active Directory Federated Service (ADFS) as an Identity provider.
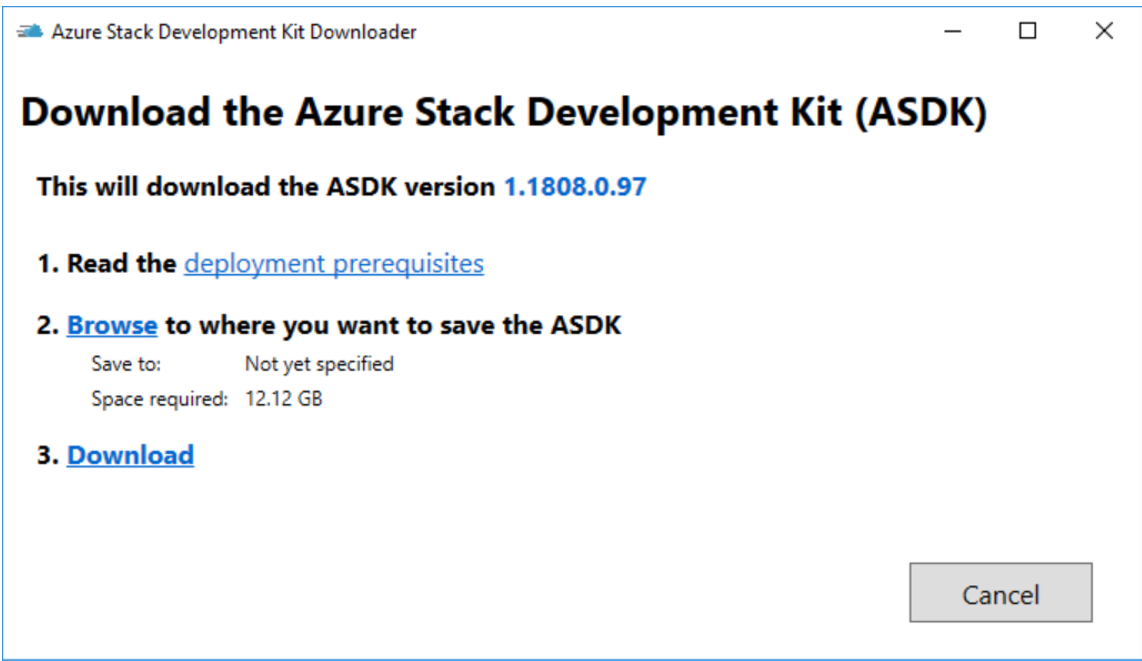
Download the ASDK from Microsoft site

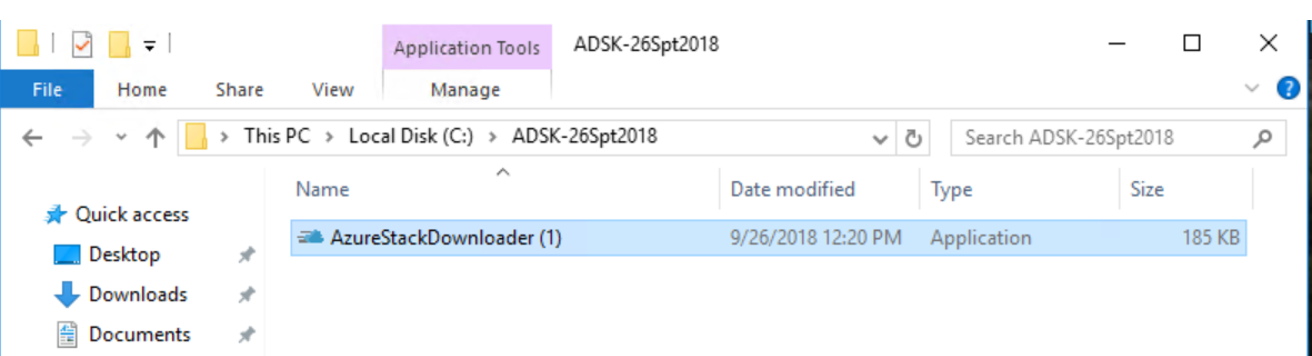
Run the Azure Stack Downloader app to download the kit
The download may take some time as it is about +12 GB of size
After the download has finished, you will need to extract it to a folder.
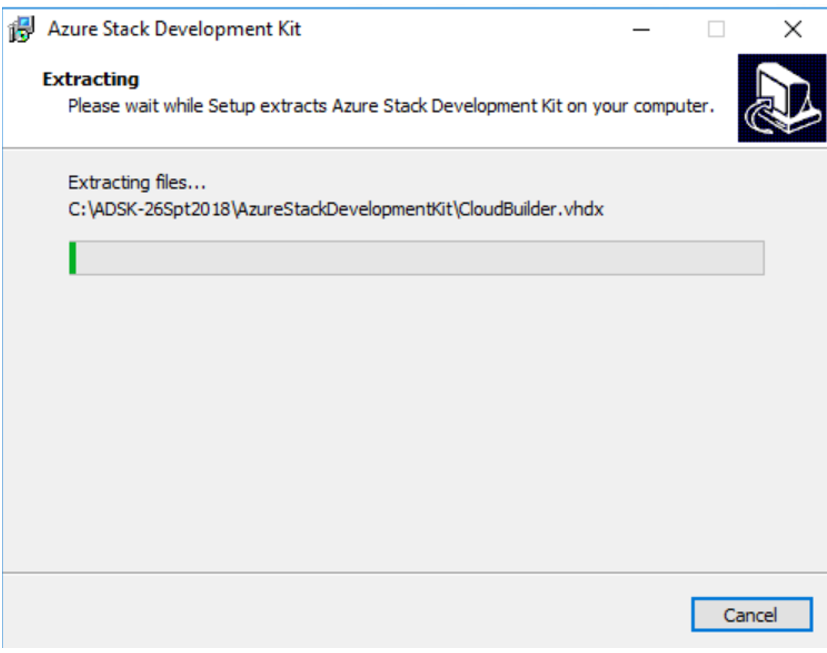
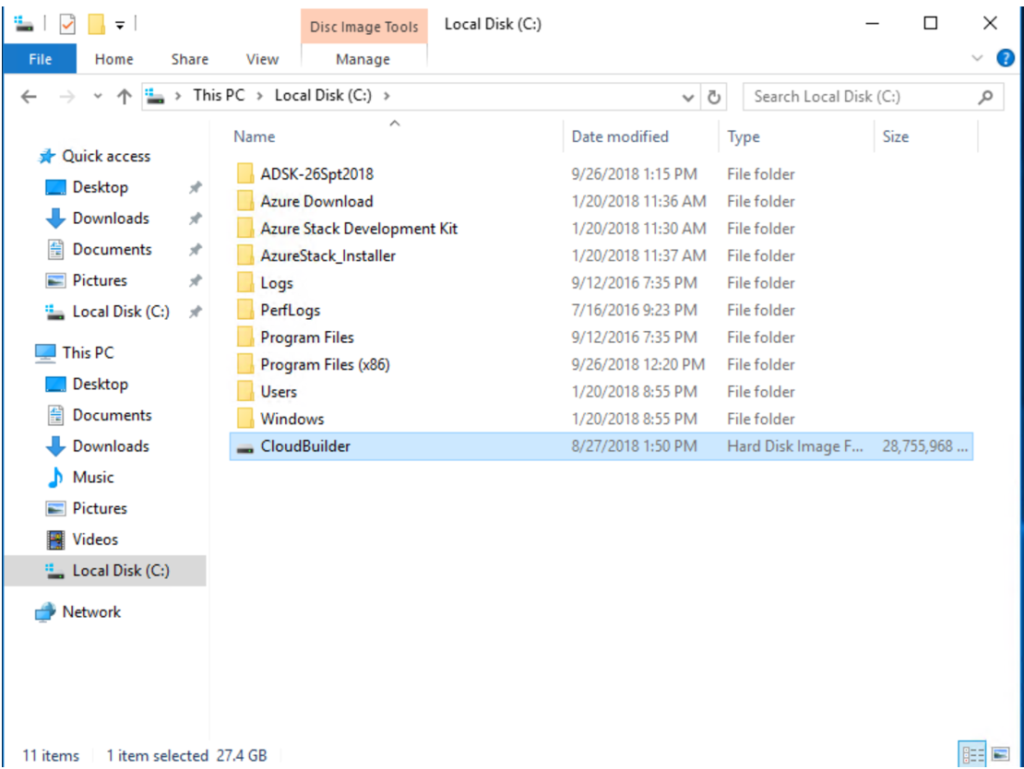
The CloudBuilder.VHDX is an important image that provide all Azure Stack services. This image will be used later to bootup the ASDK host. Place this VHDX image in C:\ of the ASDK Host.
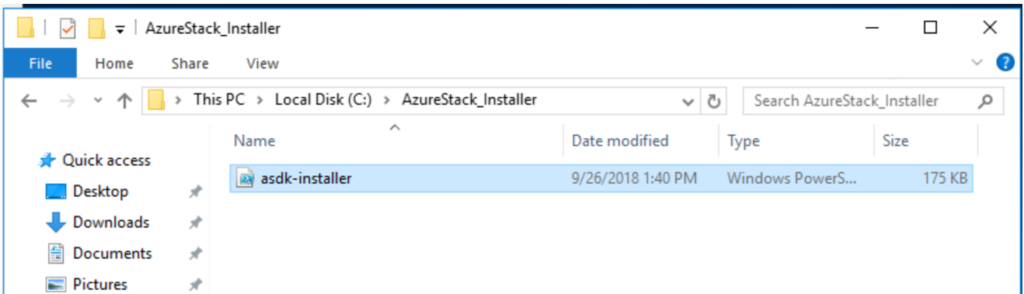
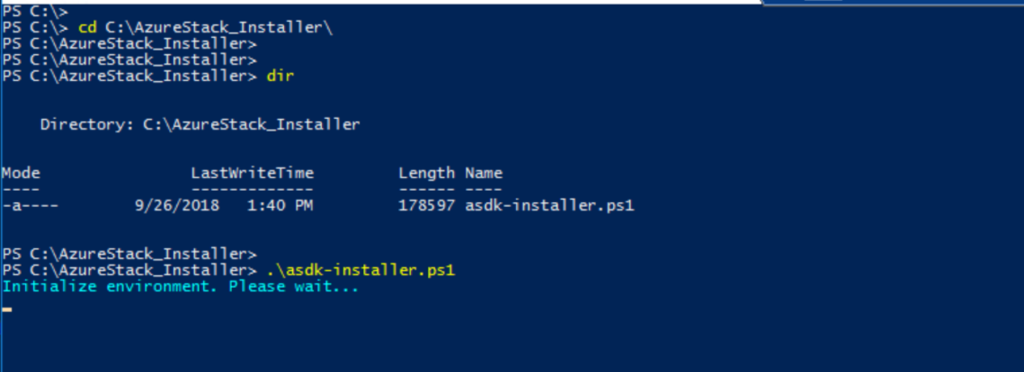
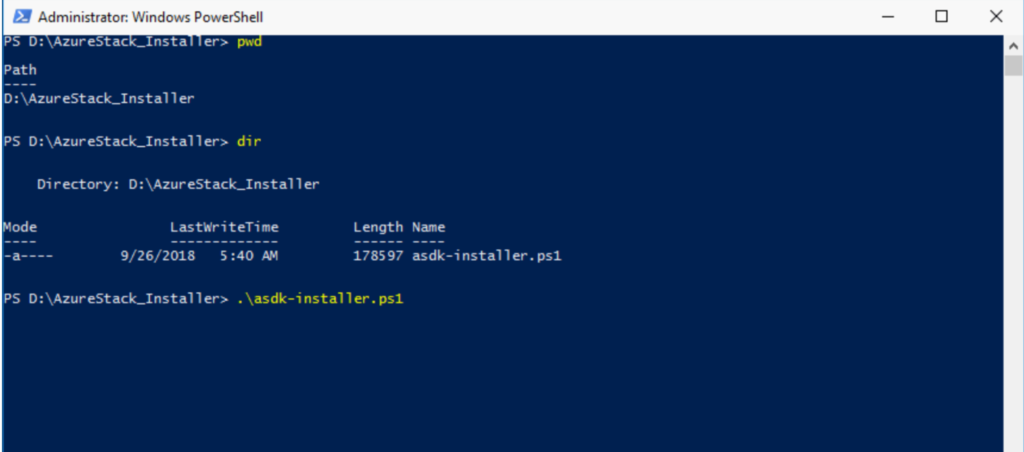
Start the ASDK Installer script i.e. asdk-installer.ps1 PowerShell script.
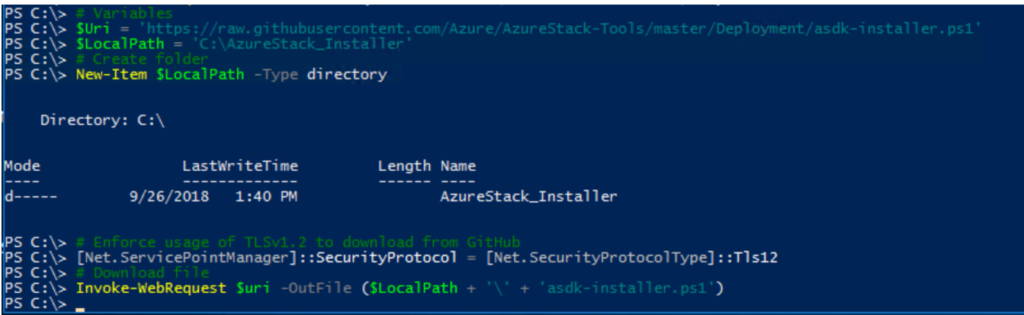
Installer script can be downloaded from Microsoft site.
https://docs.microsoft.com/en-us/azure/azure-stack/asdk/asdk-install
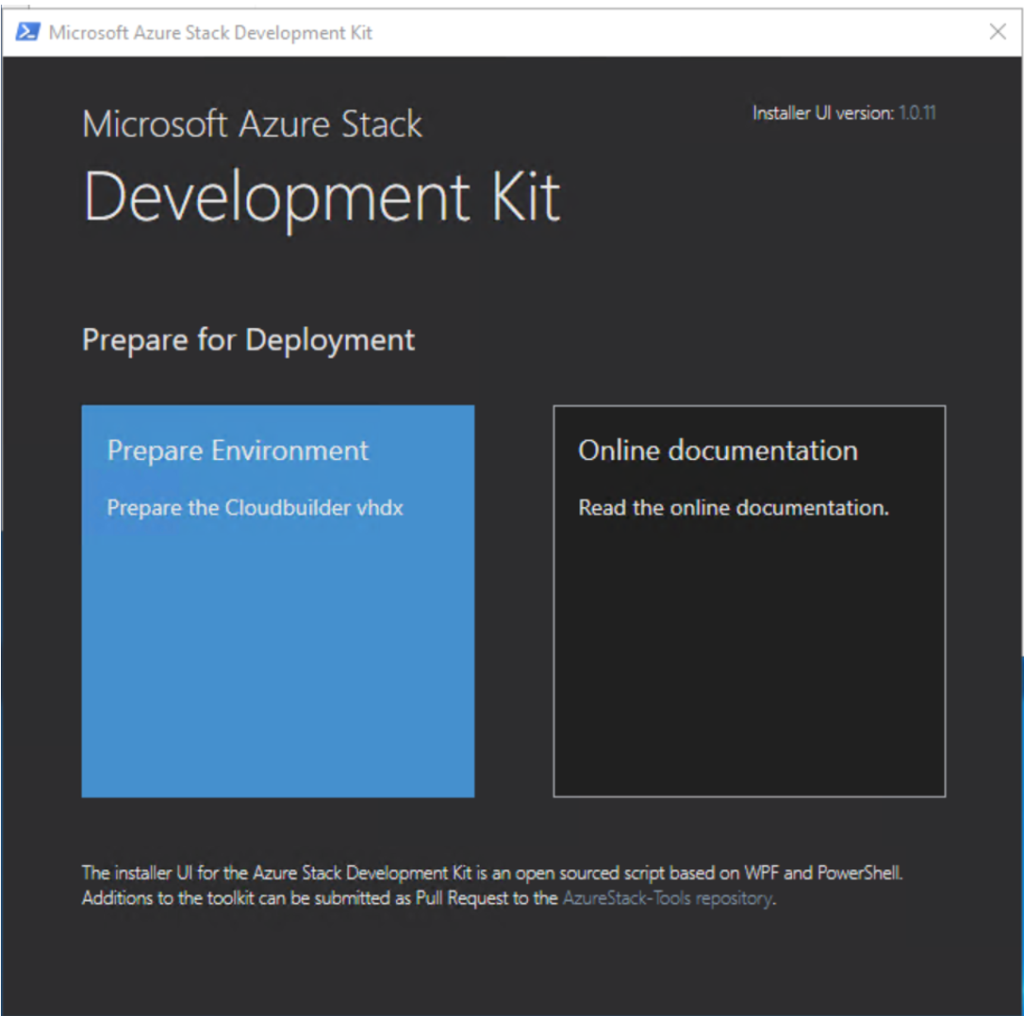
From an elevated PowerShell console, start the C:\AzureStack_Installer\asdk-installer.ps1 script, and then click Prepare Environment.
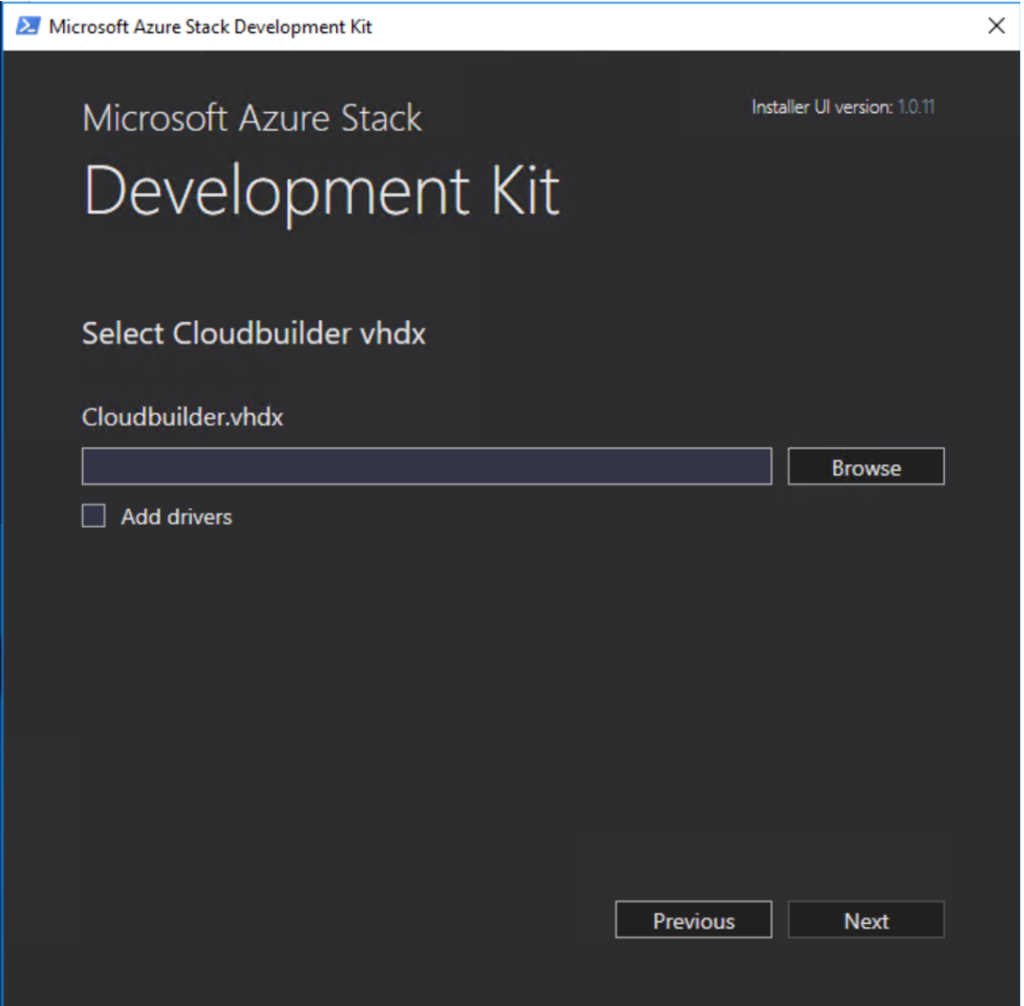
On the Select Cloudbuilder vhdx page of the installer, browse to and select the cloudbuilder.vhdx file that you downloaded and extracted in the previous steps. On this page, you can also, optionally, enable the Add drivers check box if you need to add additional drivers to the development kit host computer. Click Next.
I am using DellEMC AzureStack Developer Node in this deployment thus I don’t need to ingest drivers. The ASDK Cloudbuilder is prepacked with all the necessary drivers required for DellEMC Azure Stack developer Node
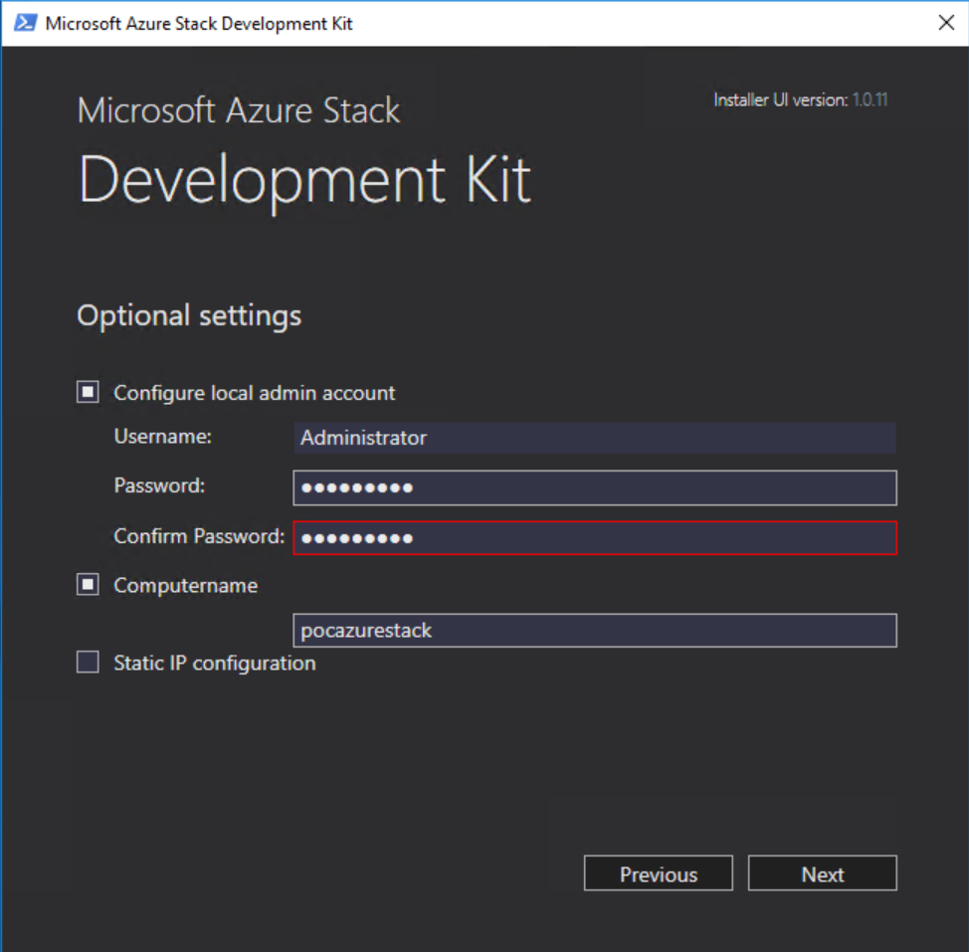
On the Optional settings page, provide the local administrator account information for the development kit host computer and then click Next.
If you don’t provide the local administrator credentials in this step, you’ll need direct console or KVM access to the host after the computer restarts as part of setting up the development kit.
You can also provide values for the following optional settings:
Computername: This option sets the name for the development kit host. The name must comply with FQDN requirements and must be 15 characters or less in length. The default is a random computer name generated by Windows.
Static IP configuration: Sets your deployment to use a static IP address. Otherwise, when the installer reboots into the cloudbuilder.vhdx, the network interfaces are configured with DHCP. If you choose to use a static IP configuration, additional options are displayed where you must also:
- Select a network adapter. Make sure you can connect to the adapter before you click Next.
- Make sure that the displayed IP address, Gateway, and DNSvalues are correct and then click Next.
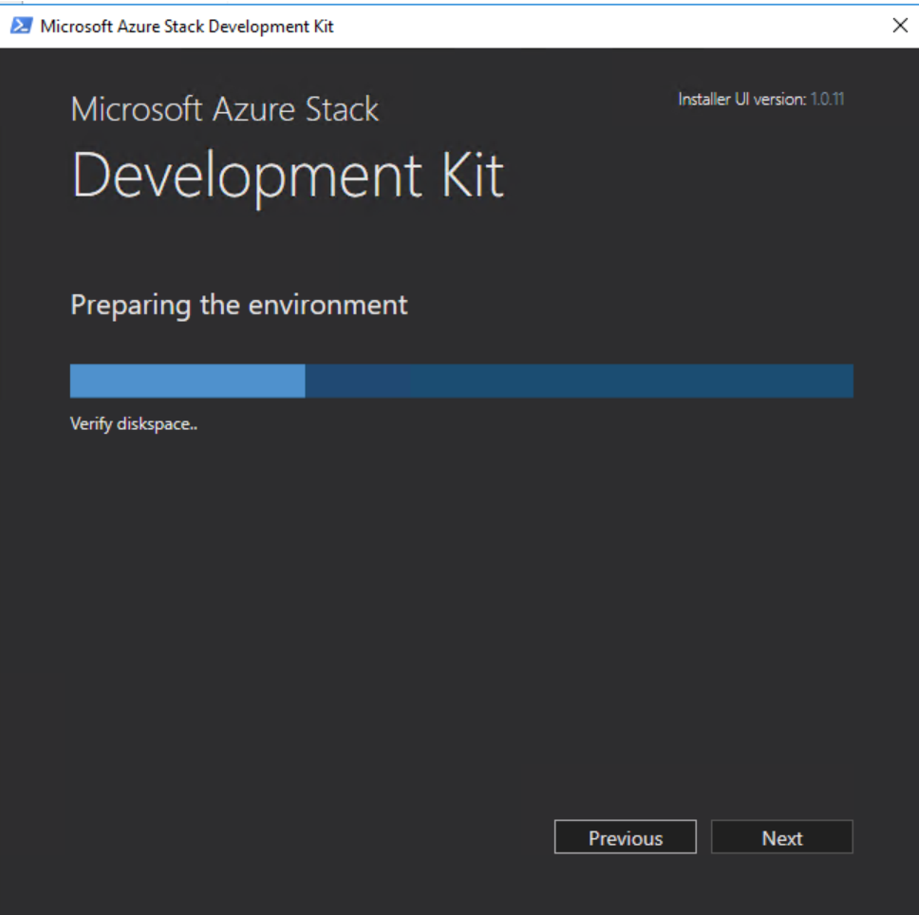
When the preparation indicates Completed, click Next.
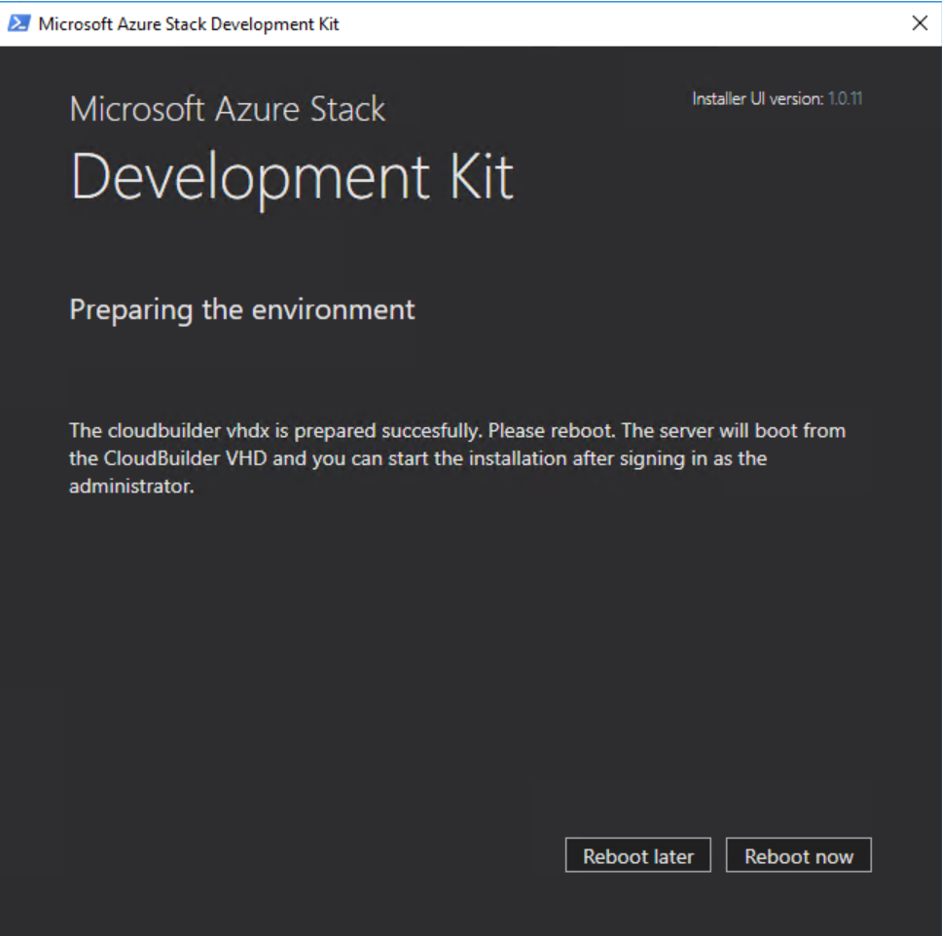
Click Reboot now to boot the development kit host computer into the cloudbuilder.vhdx and continue the deployment process.
Select Azure Stack (Booting from CloudBuilder file)

Once again run the AzureStack_Installer script from elevated PowerShell
- After the host computer successfully boots into the CloudBuilder.vhdx image, log in using the administrator credentials specified when you prepared the development kit host for ASDK installation. This should be the same as the development kit host local administrator credentials.
- Open an elevated PowerShell console and run the <drive letter>\AzureStack_Installer\asdk-installer.ps1PowerShell script. Note that the script might now be on a different drive than C:\ in the CloudBuilder.vhdx image. Click Install.
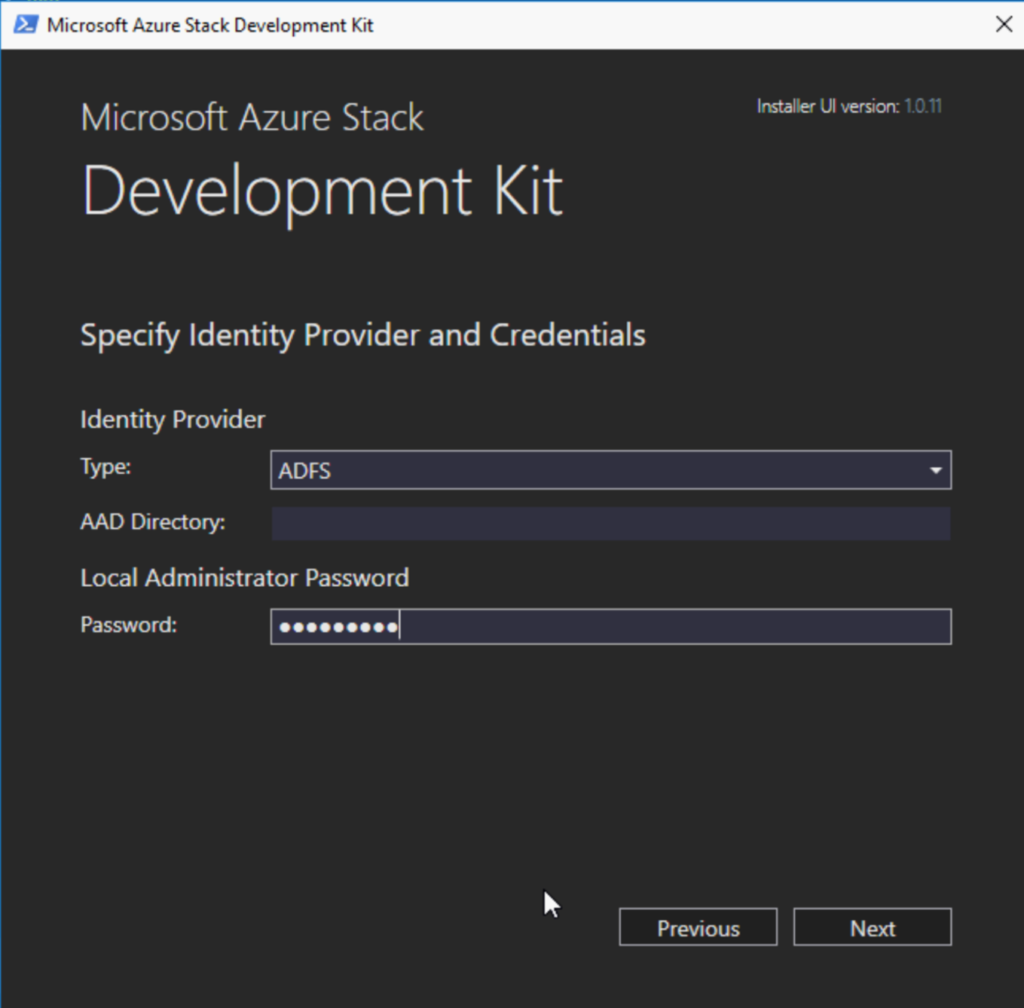
In the Identity Provider Type drop-down box, select Azure China Cloud, Azure US Government Cloud, AD FS, or Azure Cloud. Under Local Administrator Password type the local administrator password (which must match the current configured local administrator password) in the Password box, and then click Next.
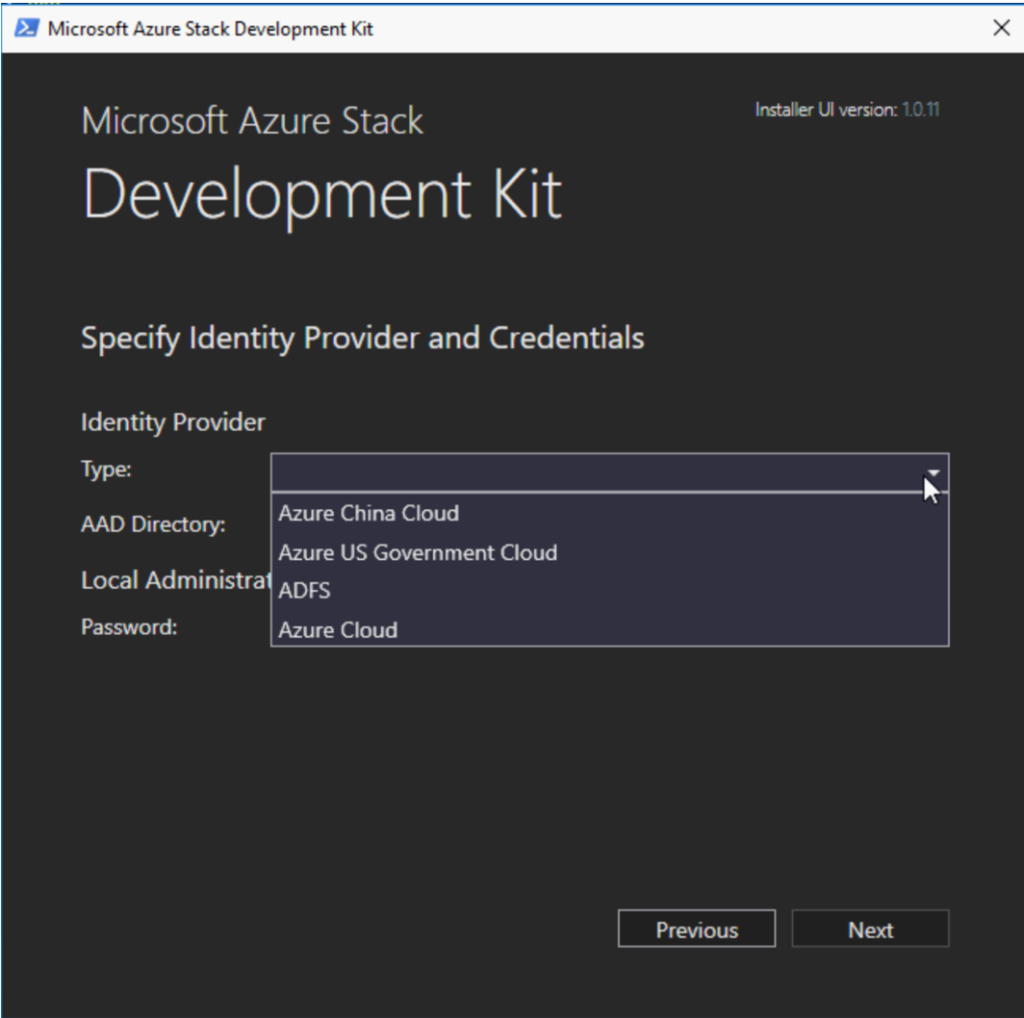
I am going to deploy Azure Stack ASDK in disconnected mode therefore I have selected ADFS
Select a network adapter to use for the development kit and then click Next.
On the Network Configuration page, provide a valid Time server IP address. This required field sets the time server to be used by the development kit.
Optionally, you can provide a DNS forwarder IP address. A DNS server is created as part of the Azure Stack deployment. To allow computers inside the solution to resolve names outside of the stamp, provide your existing infrastructure DNS server. The in-stamp DNS server forwards unknown name resolution requests to this server.

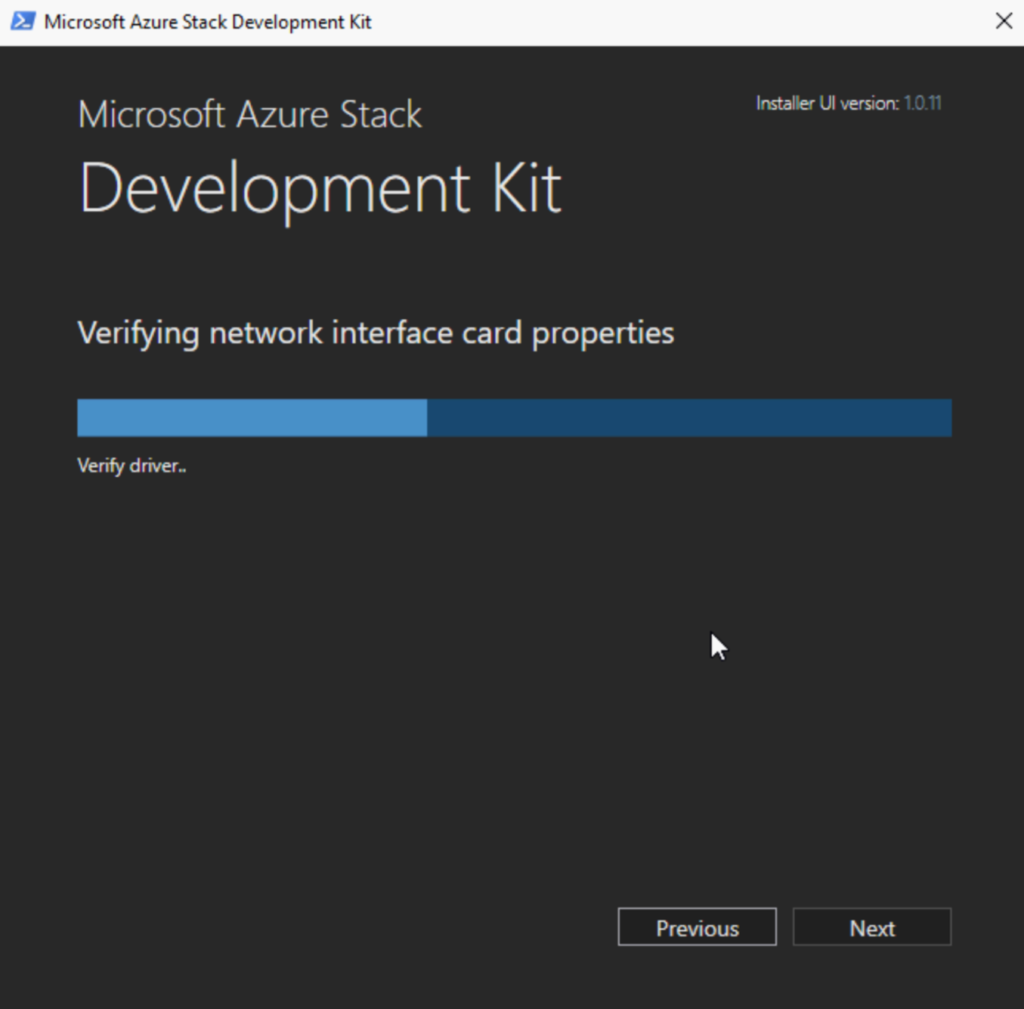
On the Verifying network interface card properties page, you’ll see a progress bar. When verification is complete, click Next.
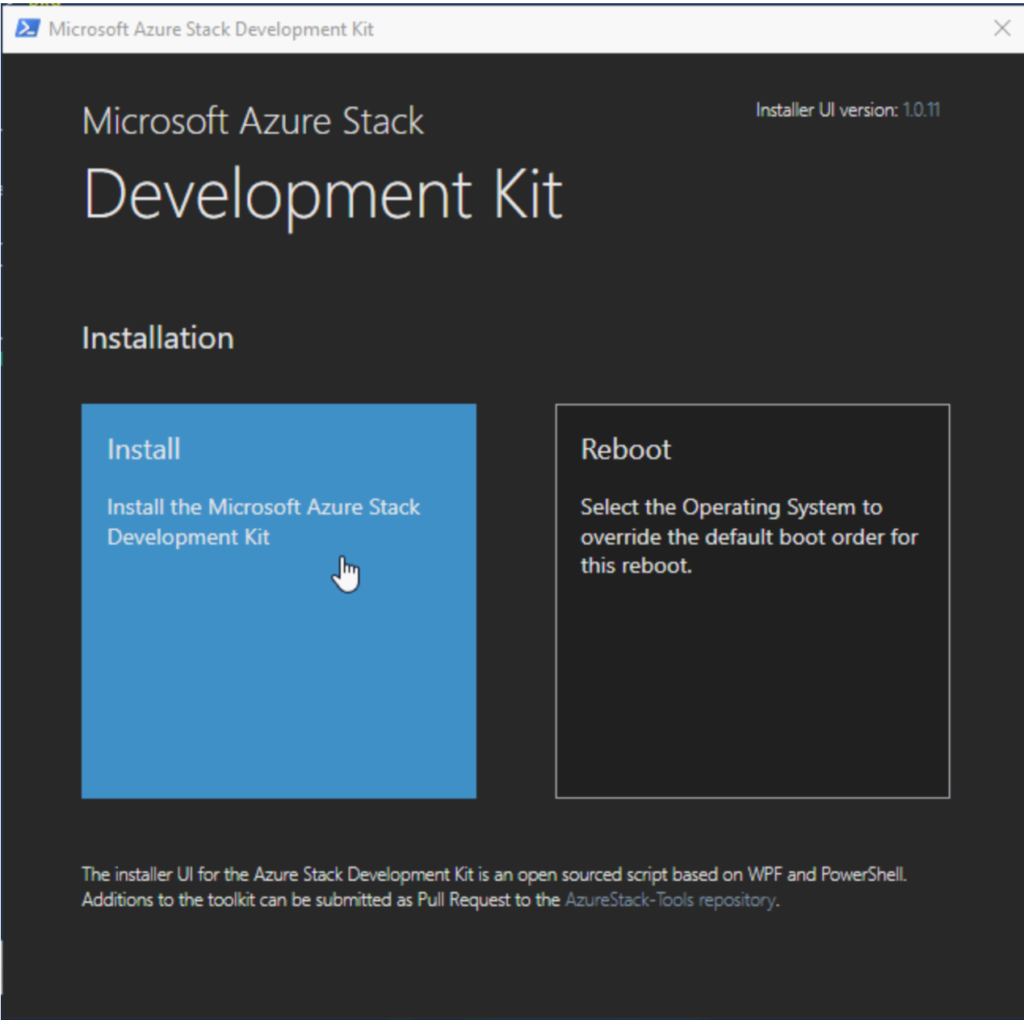
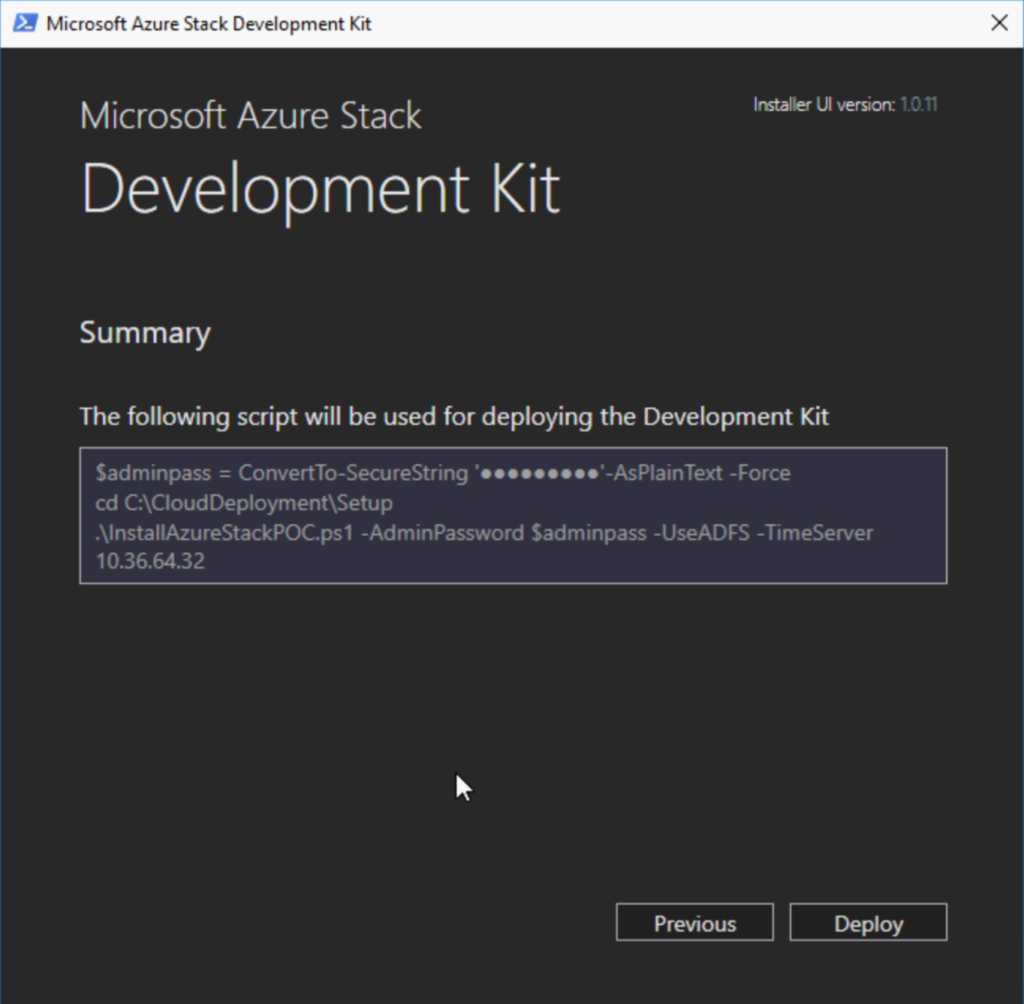
On Summary page, click Deploy to start ASDK installation on the development kit host computer.
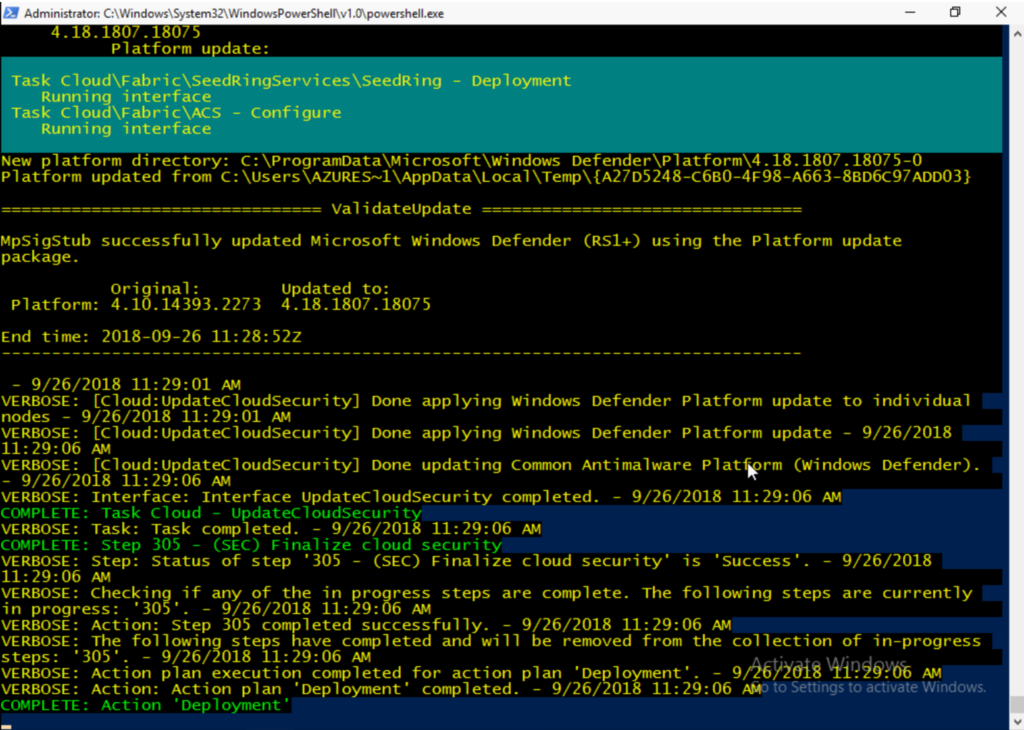
The deployment process will take a few hours, during which time the host computer will automatically reboot once. If you want to monitor the deployment progress, sign in as azurestack\AzureStackAdmin after the development kit host restarts. When the deployment succeeds, the PowerShell console displays: COMPLETE: Action ‘Deployment’.
Hope you enjoyed this post, I’d be very grateful if you’d help sharing it on Social Media. Thank you!