vSphere 7 with Kubernetes Part 2 – Enable Workload Management
In part 1 of this blog series, I covered how to create Storage tag and Policy to be used for the Workload management.
In this 2nd Part of blog series, I will cover how to enable Workload Management on vSphere 7. Once we enable the workload management on the vSphere 7, we will able to create namespaces, assign Storage policies and create applications.
To enable Workload Management, we need to select a cluster where we like to enable Workload Management on. This will also require steps to configure the cluster with NSX for network Capabilities.
Let us see how we can enable Workload Management.
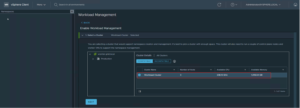
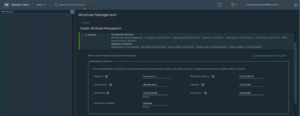
First of all, we will need to select a compatible cluster. Compatible cluster is one which has enough space, DRS and HA are enabled.
We will select a cluster that would support namespace creation and management, its best to pick a cluster with enough space. This cluster will also need to run control plane nodes and worker VMs to support namespace management.
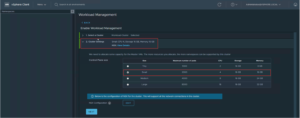
Now we will define Cluster resource settings.
We will need to allocate some capacity for the Master VMs. The more resources we allocate, the more namespaces can be created and supported by this cluster.
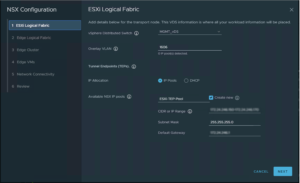
Now, we will need to configure NSX for the cluster.
Click on NSX Configuration at the bottom of the cluster setting.
For NSX Configuration, we will start with providing ESXi logical fabric information such as vDS names, Overlay VLAN, TEPs information and NSX IP Pool for ESXi TEP.
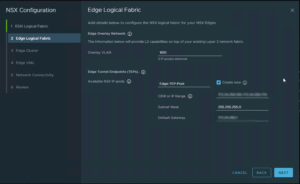
Next, we will define Edge logical fabric information. This information is needed to configure the NSX Logical fabric for the NSX Edges.
We will need to provide information such as Overlay VLAN, Edge TEPs and NSX IP pool for Edge TEPs.
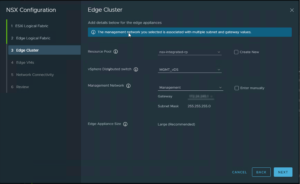
Provide details for the Edge Appliances deployment.
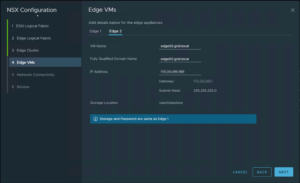
Add details for the Edge VMs such as VM names, FQDN, IP address etc.
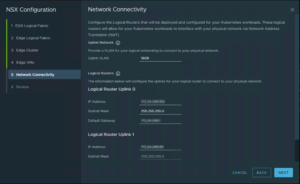
Configure the Logical Routers that will be deployed and configured for your Kubernetes Workload.
These logical routers will allow for your Kubernetes workload to interface with your physical network via NAT.
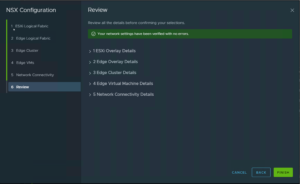
Review all the details before confirming the selections.
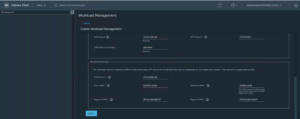
Once the NSX configuration information is defined. We will move to step 3 for entering Network details to be used for namespaces.
The workload platform consists of a control plane and a set of workers per cluster. Each cluster sits on a management network that supports traffic to vCenter.
Continue to provide information for workload network.
The workload network supports traffic to the Kubernetes API and to the Pods/Services that are deployed on the Supervisor Cluster. This network is supported by NSX.
Select the Storage Policy. Please refer blog part 1 of this blog series to know how to create storage tag and policy.
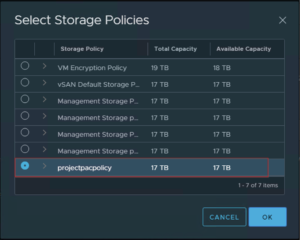
Select the storage using above policy for Control Plane Node, Ephemeral Disks & Image Cache.
Review all the details and confirm your set up. Click on Finish.
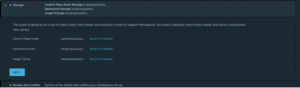
You can monitor the confirmation status from Workload Management option from vCenter Menu.
Here is how successful configuration represented. Notice Configuration status, Kubernetes status and Control Plane Node Health are healthy.

In the next part for the blog series, I will cover how to create content Library for the latest distributions of Kubernetes and accompanying OS.
Hope you enjoyed this post, I’d be very grateful if you’d help to share it on Social Media. Thank you!