vRSLCM is Winner!! – Deploy vRealize Operations in Cloud Foundation
In my previous blogs, I had covered my experience and procedure to stretch a MGMT workload domain on VCF, in this blog I will share information on vRealize Operations Manager (vROPS) deployment & configuration using vRealize Suite Lifecycle Manager (vRSLCM) on VMware Cloud Foundation (VCF) platform.
What Does vRealize Suite Lifecycle Manager (vRSLCM) offer?
VMware vRealize Suite Lifecycle Manager comes free with VMware vRealize Suite in all three editions. It is designed to simplify the deployment and on-going management of the vRealize product portfolio. It delivers fast time-to value, improved user experience and greater operational efficiency to vRealize Suite customers.
Following are some of the Use-Cases of vROPS
- Continuous Performance Optimization
- Assure performance, driven by operational and business intent, with predictive analytics driving actions to automatically balance workloads and proactively avoid contention.
- Efficient Capacity Management and Planning
- Reduce risk with real-time, predictive capacity analytics correlated with cost analytics, delivering optimal densification and proactive planning and procurement.
- Intelligent Remediation
- Predict, prevent and troubleshoot faster with actionable insights correlating metrics and logs. Streamline and centralize IT operations with native SDDC integrations, federated views and a highly scalable and extensible platform.
- Integrated Compliance
- Reduce risk and enforce IT and regulatory standards with integrated compliance and automated drift remediation.
Prerequisites
- Verify that you have downloaded the vRealize Suite update bundles from the depot. These are obtained separately from the Cloud Foundation installation download
- Verify that you have a valid license key for vRealize Operations, which is purchased separately from Cloud Foundation.
- Verify that IP allocation and forward/reverse DNS records are prepared for the following components
-
- All vRealize Operations nodes.
- vRealize Suite Lifecycle Manager virtual appliance. This is required only if you have not previously configured this as part of deploying vRealize Automation in Cloud Foundation.
- The vRealize Suite load balancer VM. This is required only if you have not previously configured this as part of deploying vRealize Automation in Cloud Foundation.
- Verify that the vRealize Network is configured on the switches. The vRealize subnet is routable to the Management network. The firewall between the Management and vRealize networks should be disabled.
- vRealize Suite Lifecycle Manager has to be deployed before you could provision vROPS or vRA.
Lets proceed with deployment.
On the SDDC Manager Dashboard, navigate to Administration > vRealize Suite.
The vRealize navigation bar appears, listing the vRealize products available to your Cloud Foundation deployment.
Click vRealize Operations & Click Deploy.

The vRealize Operations installation wizard opens, displaying the Deployment Details panel.
Complete the following settings to start the installation.
This is where proper planning and execution delivers the correct result. You need to plan these prerequisite before hand in order to successfully deploy and configure the vROPS on VCF.
Make sure you have valid license key. The DNS forward/reverse records should be properly created for vROPS Node, vRSLCM & vRealize Load Balancer.
When you deploy VCF, essentially cloud builder deployment provisions & configure vSphere, vSAN & NSX. NSX will play an important role during vROPS deployment by configuring vRealize Load Balancer for vROPS & vRA. The initial NSX Edge load balancer is automatically created.
Based on above information and requirement of the vRealize Load Balancer (NSX Load Balancer), you will need a vRealize VLAN to be configured on the switches.
The vRealize VLAN should be routable VLAN to your Management network.

Once all the prerequisite and configuration are in place. You can proceed with the vROPS deployment.
On the vRealize Operations installation wizard, you will need to provide license key and node size e.g. Medium. The node size limits the number of nodes you can specify. For sizing guidelines, see the Knowledge Base article vRealize Operations Manager 6.6 and 6.6.1 Sizing Guidelines.

Host name configuration settings will make sure that correct FQDNs are assigned to components.
Load Balancers-
For NSX Edge Service Gateway: Enter the FQDN for the NSX Edge load balancer VM. The initial NSX Edge load balancer is automatically created to balance the nodes in the analytics cluster.
For vRealize Operations: Enter the FQDN for the vRealize Operations VM.
vRealize Operations Nodes-
Node 1 FQDN (If you have multiple nodes as part of High availability deployment then specify FQDNs of all the nodes.
vRealize Suite Lifecycle Manager-
Enter the FQDN (you should have vRSLCM component already deployed and configured)

In this deployment section provide Account information i.e. password for vRealize Operations System Administrator
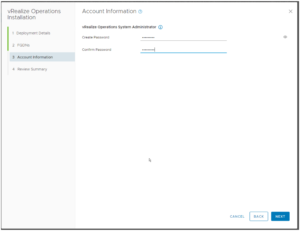
Click Next to move to the Review Summary page. Review the deployment configuration settings, and click Finish to accept the configuration
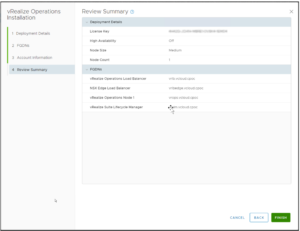
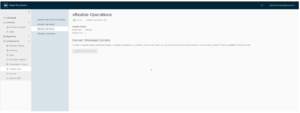
When you click Finish, you are returned to the vRealize Operations splash page. A status message is displayed near the top of the page, indicating that the deployment is in progress.
If the deployment fails, this page displays a deployment status of Failed and prompts you to uninstall.
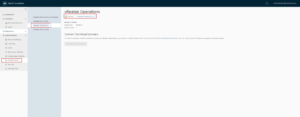
After vRealize Operations successfully deploys in your Cloud Foundation environment, the SDDC Manager Dashboard > Administration > vRealize Suite > vRealize Operations page displays an ACTIVE status.
Boom!! Deployment will proceed to create NSX Edge Gateway with Load Balancer, create vROPS. You can Launch vROPS and start using it. You can Connect the vROPS to other Workload Domain in VCF too.
Launch the vROPS from vRealize Suite tab in SDDC Manager.
It will open vRealize Operation Load Balancer VIP you provided during deployment.
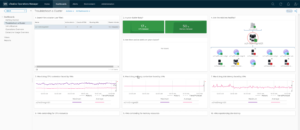
Here is how the vROPS dashboard looks like.
Hope you enjoyed this post, I’d be very grateful if you’d help sharing it on Social Media. Thank you!
One Comment
coderv
Nicely done. I was exactly looking for this to setup my lab.